
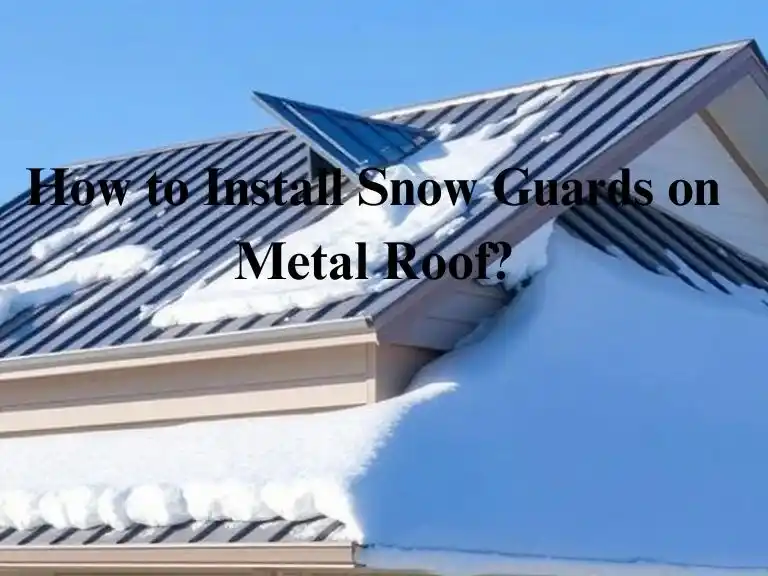
Installing snow guards on a pitched metal roof is an essential step to mitigate hazards associated with snowpack buildup and sudden sliding forces. Without a retention system, snow and ice can accumulate and release in an avalanche-like fashion, posing risks to eaves, walkways, driveways, and property.
This guide will provide a step-by-step approach to snow guard installation, covering types of systems, spacing considerations, fastener compatibility, and site-specific engineering factors.
Table of Contents
Understanding Snow Guards
What Are Snow Guards?
Snow guards are devices designed to restrain snowpack on a rooftop, allowing it to melt gradually instead of sliding off in a dangerous manner. Their compressive strength and density help prevent excessive vector forces on structures and adjacent surfaces.
Types of Snow Guards
Snow guards come in a variety of shapes, sizes, and materials, categorized as:
- Pad-Style (Unitized) Snow Guards: Single or multi-component discontinuous cleats placed in staggered patterns.
- Rail-Type Systems: Continuous cross-member or bar systems, spanning across the entire roof width.
- Pipe-Style Snow Guards: Tubular barriers, anchored with brackets and seam clamps for maximum retention.
Choosing the Right Snow Guards
When choosing snow guards, consider:
- Roof Type: Standing seam, corrugated metal panels, or face-fastened profiles.
- Climate Factors: Cold regions with significant snowfall require greater retention strength.
- Aesthetic Preference: Select color-matched coated metals such as aluminum, stainless steel, brass, or copper.
- Durability and Service Life: Look for UV-resistant polycarbonates or powder-coated options to prevent fading and chalk buildup.
2. Tools and Materials Needed
| Tools/Materials Needed | Uses |
| Snow Guards (pad-style, pipe-style, or rail-type) | Prevent snow and ice from sliding off the roof suddenly, allowing gradual melting. |
| Fasteners (stainless steel screws, seam clamps, or adhesive) | Secure snow guards to the roof, ensuring stability and proper retention. |
| Sealants (butyl copolymer, EPDM washers for waterproofing) | Prevent leaks and maintain waterproofing integrity around fasteners. |
| Measuring Tools (chalk line, tape measure, water-soluble pen) | Ensure accurate placement of snow guards for even distribution. |
| Drill, Nuts, Bolts, and Torque Wrench | Attach snow guards securely while maintaining the correct torque for long-term performance. |
| Ladder, Fall Protection Gear, and Non-Slip Footwear | Ensure safety during installation by preventing falls and providing stability. |
3. Planning the Installation
Placement Considerations
Proper placement of snow guards is essential to mitigate risks and enhance snow retention efficiency. Install above high-risk areas, such as entryways, driveways, and garage roofs, to prevent sliding snow hazards. Unsupported overhangs should be avoided, as structural walls provide a more secure anchoring surface. Consider tributary areas, adjacent surfaces, and dynamic snowpack accumulation to optimize retention forces. Ensuring correct placement will help resist compressive strength variations caused by wind, gravity, and heat loss effects.
Spacing & Load Calculations
For rail-type retention systems, installation should span the entire roof width with multiple rows to effectively limit migration downslope. Pad-style unitized snow guards should be arranged in a redundant bridging pattern, ensuring continuous load distribution across the pitched metal roof. Local engineering calculations, including vector force assessments, should be used to determine the required load-bearing capacity. Accredited lab testing and manufacturer bulletins provide critical guidelines for attachment points, spacing, and fastening compatibility. Proper calculation of in-service loads prevents overloaded panels and structural failures while maintaining aesthetically integrated snow retention systems.
4. Installation Methods
A. Clamp-On Snow Guards (For Standing Seam Roofs)
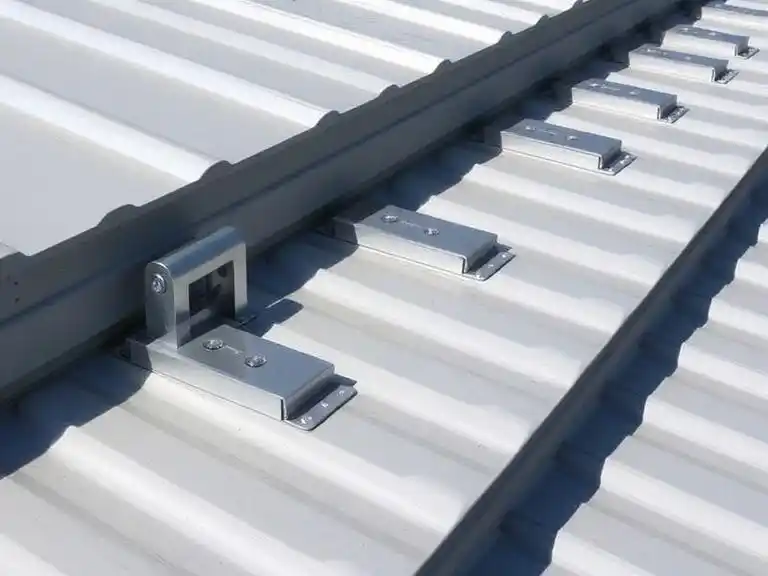
Clamp-on snow guards are a non-penetrating installation method designed for standing seam metal roofs. These systems use seam-specific clamps that attach securely without drilling into the roofing panels, preserving the structural integrity and waterproofing performance of the roof.
Why Choose Clamp-On Snow Guards?
- Best suited for standing seam roofs where penetrations are not recommended.
- Prevents sudden snowpack migration, reducing risk to eaves, driveways, and walkways.
- Ensures even distribution of load across the tributary area, preventing localized failure.
- Retains compressive strength and resists vector forces caused by accumulating snow and ice.
Tools & Materials Needed
Before starting, gather the following:
Torque Wrench: Ensures correct torque application to avoid overloading the clamps.
Seam Clamps: Engineered to match specific standing seam profiles, allowing secure attachment.
Cross-Members (Bars or Rails): Bridging components that span the roof’s width, limiting snow migration downslope.
Measuring Tools (Chalk Line, Tape Measure, Water-Soluble Pen): Helps in accurate placement and alignment.
Step-by-Step Installation Guide
- Mark Attachment Points
- Use a chalk line to establish straight reference lines across the roof.
- Placement should follow manufacturer’s spacing guidelines, considering slope, tributary area, and potential loads.
- Secure the Clamps
- Position seam-specific clamps directly over the standing seam ribs.
- Use a torque wrench to fasten clamps properly, ensuring consistent pressure without deforming the panel.
- Attach Cross-Members
- Insert rail-type cross-members or pipe-style bars into the clamps.
- Ensure the system spans the entire roof width, preventing snow accumulation in valleys and scouring areas.
- Tighten All Clamps Evenly
- Apply even torque across all clamps, avoiding excessive pressure on the seams.
- Refer to the manufacturer’s torque specifications to maintain adequate strength and retention.
- Final Adjustments & Verification
- Check that all components are aligned properly.
- Confirm that the clamps are secured and not over-torqued, preventing damage to the metal roof surface.
Advantages of Clamp-On Snow Guards
No Roof Penetrations
Unlike screw-down systems, clamp-on guards do not require drilling, reducing water penetration risks.
Mechanically Adjustable Without Compromising Waterproofing
The non-invasive attachment method ensures seam compatibility without affecting the roof’s protective coatings.
Engineered for Maximum Performance
Designed to retain heavy snow loads, ensuring safe and gradual melting rather than sudden ice movement.
In-Service Durability & Longevity
Tested for cold climates, withstanding dynamic forces, UV exposure, and compression impact from snow buildup
Disadvantages of Clamp-On Snow Guards
Limited to Standing Seam Roofs Only:
Clamp-on systems cannot be used on corrugated or face-fastened metal panels, restricting their application to specific seam profiles.
Requires Precise Torque Adjustment:
Over-tightening clamps can damage the seam, while under-tightening may cause the system to shift under snow loads, reducing effectiveness..
This method is particularly effective in regions with frequent snowfall and steep roof pitches, where snow retention systems are crucial for protecting property and people from falling snow and ice.
B. Screw-Down Snow Guards (For Exposed-Fastener Metal Roofs)
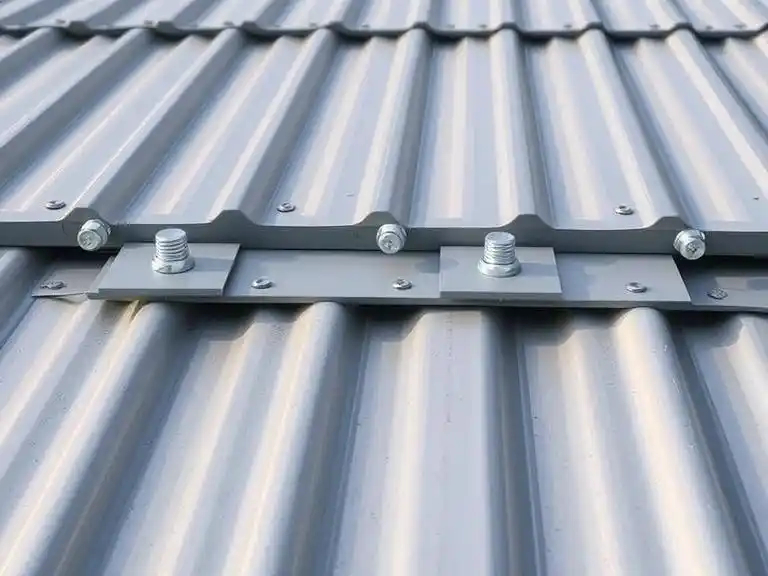
Screw-down snow guards provide strong mechanical retention for corrugated, face-fastened, and profiled metal panels. These directly fastened systems are designed to resist significant sliding forces by anchoring into structural components, preventing sudden snowpack release.
This installation method is ideal for high-snowfall regions where additional strength and stability are required to retain snow loads effectively.
Why Choose Screw-Down Snow Guards?
- Best suited for exposed-fastener metal roofing where clamps cannot be used.
- Provides long-lasting durability by firmly securing snow guards to the roof structure.
- Effectively prevents snow migration downslope, protecting walkways, driveways, and lower roof sections.
- Engineered to resist compressive loads, helping mitigate avalanche-like snow movement.
Tools & Materials Needed
Drill & Torque Wrench: Required for precise pilot hole drilling and proper torque application to fasteners.
Butyl Copolymer Sealant: Essential for waterproofing to prevent leaks around fastener points.
Fasteners (Stainless Steel Screws, Nuts, Bolts): Securely attach the snow guards to the structural substrate.
Measuring Tools (Water-Soluble Pen, Tape Measure, Chalk Line): Ensures accurate placement and even weight distribution.
Step-by-Step Installation Guide
- Mark Spacing Guidelines
- Use a water-soluble pen to mark attachment points based on manufacturer recommendations.
- Snow guards should be strategically placed to distribute weight evenly across the entire roof surface.
- Drill Pilot Holes
- Ensure fasteners penetrate into purlins, furring strips, or decking for adequate strength.
- Avoid drilling directly into unsupported roof panels, as this can lead to panel deformation and failure.
- Apply Waterproofing Sealant
- Use butyl copolymer sealants or EPDM washers around the drilled holes.
- This step is critical for preventing water leaks, ensuring long-term protection against moisture infiltration.
- Secure Snow Guards Using Fasteners
- Attach the snow guards with stainless steel screws, nuts, and bolts, ensuring they are properly torqued.
- Follow manufacturer torque specifications to prevent overtightening, which could compromise the roof panel’s integrity.
- Check for Leaks & Reinforce Attachments
- Inspect all fasteners for proper engagement and verify sealant effectiveness.
- If leaks are detected, apply additional sealant or adjust fasteners accordingly.
Advantages of Screw-Down Snow Guards
Strong Mechanical Retention
Securely fastened directly to the roof, providing high resistance against snow movement.
Long-Lasting Durability
Designed to withstand heavy snow loads, making it ideal for regions with extreme winter conditions.
Versatile Application
Suitable for corrugated, trapezoidal, and exposed-fastener metal roofing profiles.
Disadvantages of Screw-Down Snow Guards
Penetrates Metal Panels, Increasing Risk of Water Leaks
Unlike clamp-on systems, this method requires drilling, which can compromise waterproofing if not sealed properly.
Not Recommended for Standing Seam Roofs
This method cannot be used on standing seam panels, as it would damage the panel’s structural integrity and coated finishes.
C. Adhesive-Mounted Snow Guards (For Smooth Metal Roofs)
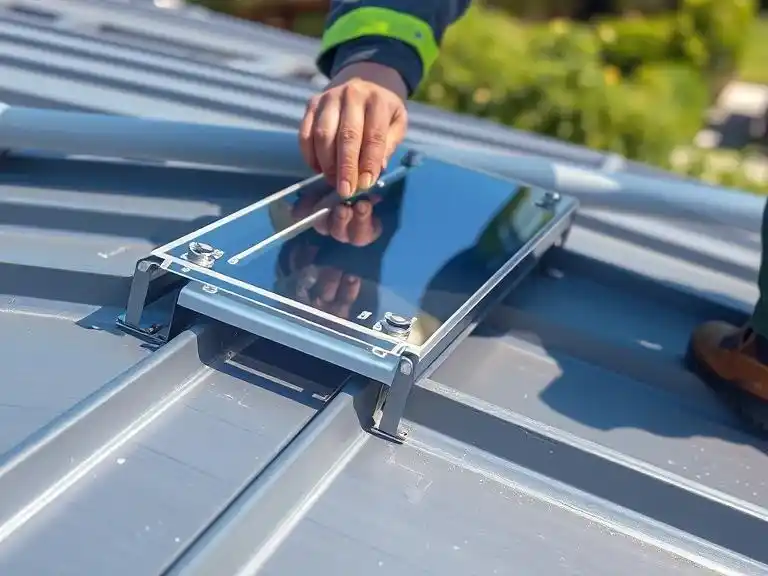
Adhesive-mounted snow guards offer a non-invasive installation method for flat metal panels, where drilling is not an option. Instead of mechanical fasteners, this method relies on high-strength adhesives to bond the snow guards directly to the roofing surface, preserving the roof’s waterproofing and structural integrity.
This approach is ideal for aesthetic-conscious installations where visible fasteners, bolts, or clamps may not be desired. However, adhesive-mounted snow guards require proper preparation and curing time to ensure long-term effectiveness.
Why Choose Adhesive-Mounted Snow Guards?
- Best suited for smooth, flat metal roofs, where penetration could cause leaks.
- Preserves the roof’s integrity by avoiding the need for screws or clamps.
- Reduces the risk of panel deformation, especially for thin or soft-coated metal roofing materials.
- Aesthetic-friendly, as the guards blend seamlessly into the roof design without exposed fasteners.
Tools & Materials Needed
High-Strength Adhesive: Specifically engineered for metal-to-polycarbonate or metal-to-metal bonding.
Solvent for Cleaning: Ensures a contaminant-free surface for proper adhesion.
Measuring Tools (Chalk Line, Tape Measure, Water-Soluble Pen): Helps in accurate placement to avoid uneven distribution.
Protective Gloves & Applicator Tools: Prevent contamination of the adhesive during application.
Step-by-Step Installation Guide
- Clean the Roof Surface
- Use a solvent-based cleaner to remove dirt, oil, grease, and debris from the metal panels.
- This step is critical for ensuring proper adhesion and long-lasting performance.
- Apply Manufacturer-Approved Adhesive
- Using the recommended adhesive, apply a uniform layer to the back of each snow guard.
- Ensure adequate coverage without excess runoff, which can weaken the bond.
- Firmly Press the Snow Guard onto the Marked Placement Area
- Align the snow guard with chalk line markings and press it down firmly.
- Hold in place for a few seconds to allow initial bonding.
- Allow 24-48 Hours for Curing Before Exposure to Snowpack Loads
- The adhesive must fully cure before the snow guard can bear weight or resist downward forces.
- Avoid disturbing or testing the adhesion during this curing period.
Advantages of Adhesive-Mounted Snow Guards
Non-Invasive, Preserves Roof Integrity:
No need for fasteners, drilling, or clamps, reducing the risk of leaks or structural compromise.
Aesthetic-Friendly, Avoids Visible Fasteners:
Snow guards blend seamlessly into the roof surface, making them ideal for modern architectural designs.
Compatible with a Wide Range of Roofing Materials:
Works well with coated steel, aluminum, copper, zinc, and polycarbonate finishes.
Disadvantages of Adhesive-Mounted Snow Guards
Less Durable, Can Weaken Over Time:
Adhesion strength may degrade due to UV exposure, temperature fluctuations, and heavy snow loads.
Performance Dependent on Climate Exposure:
Extreme cold, excessive moisture, or prolonged heat can affect adhesive longevity.
5. Safety Considerations
Use Fall Protection Gear
Always wear a harness, safety ropes, and non-slip boots to prevent falls. Secure ladders properly before working on the roof.
Avoid Hazardous Weather
Never install during windy, icy, or wet conditions, as slick surfaces increase the risk of slips and falls.
Check Fastener Torque
Ensure all screws, clamps, and brackets are torqued correctly to prevent loosening under snowpack loads.
Follow Manufacturer Guidelines
Adhere to load calculations and seam-specific compatibility to maintain structural integrity and prevent failure.
6. Maintenance & Inspection
Routine Inspections
- Check for loose fasteners, corrosion, or movement of snow guards.
- Verify color consistency to prevent aesthetic mismatch.
Cleaning & Repairs
- Remove debris accumulation and verify sealant integrity.
- Reapply adhesive or reinforce fasteners as needed.
Installing snow guards on a pitched metal roof requires careful planning, correct spacing, and proper attachment methods. Whether using clamp-on, screw-down, or adhesive-mounted systems, following manufacturer torque specifications and site-specific engineering calculations ensures long-term performance. By implementing the right retention system, you can prevent rooftop avalanches, increase roof durability, and enhance safety for both property and pedestrians.
For further guidance, refer to instructional videos, engineering bulletins, and manufacturer resources to ensure your snow guard system is correctly installed and tested.