
Installing heat cables on a metal roof is an essential solution for preventing ice dams, snow build-up, and potential water damage during harsh winter months. These cables, also called de-icing cables or heating cables, work by maintaining a controlled temperature along the eaves, valleys, and gutters, ensuring proper water drainage and protecting your roof’s structural integrity. Whether you’re dealing with heavy snow loads, ice formations, or steep roof pitches, correctly installing heat cables can save you from costly repairs and improve your roof’s performance. In this guide, you’ll learn everything you need to know, from the tools and materials required to a step-by-step installation process, along with essential safety considerations to ensure your project is a success.
Tools and Materials You Will Need
| Tools and Materials | Use |
| Heat Cables / De-Icing Cables | Prevents ice build-up and ice dams by melting snow and maintaining water flow. |
| Heat Tape / Heating Cable | Provides controlled heat for roof valleys, eaves, and gutters during winter. |
| Adhesive-Lined Cable Clamps | Secures heat cables to the roof surface without causing damage to the metal roof. |
| Roof Clips | Holds the cables in place on the roof pitch, ensuring proper alignment. |
| Self-Tapping Sheet Metal Screws | Fastens clips and clamps securely to the roof material, ensuring stability. |
| Measuring Tape | Measures the length of areas to install heating cables and ensures accurate placement. |
| Rubber Insulation | Protects heat cables and prevents heat loss, enhancing efficiency. |
| Aluminum Foil Covering | Reflects heat and provides additional insulation for the heating cables. |
| Chalk Line | Helps mark straight lines for cable placement along the roof perimeter and eaves. |
| Power Drill | Drills holes for screws and fasteners when attaching clips or clamps. |
| GFCI-Protected Outlet | Provides a safe power source for the heat cables, preventing electrical hazards. |
| Thermostat or Automatic Controller | Regulates the temperature of the cables to prevent overheating and reduce energy usage. |
| Safety Harness | Protects against falls while working on the roof pitch or steep areas. |
| Downspout Hangers | Guides cables through downspouts, ensuring proper water drainage and de-icing. |
| Self-Regulating Cable | Adjusts heat output based on surrounding temperature, enhancing energy efficiency. |
| Compression-Based Clamps | Secures cables along roof edges or gutters, preventing movement or displacement. |
| Weather-Resistant Leads | Ensures durable power connections in outdoor environments. |
| Zip Screws | Secures cables and clamps near downspout openings to prevent fraying or shifting. |
| Spray-In Polyurethane Foam Insulation | Protects exposed parts and prevents cold air infiltration under the roofing material. |
Step-by-Step Guide to Installing Heat Cables on a Metal Roof
Step 1: Plan Your Installation
The first step in installing de-icing cables is to carefully assess your roof perimeter, roof pitch, valleys, and eaves. Measure the areas where ice damming or snow load typically occurs, such as along gutters, downspouts, roof valleys, and dormers. Use a measuring tape to take accurate measurements of the overhang width, valley length, and downspout length, and sketch a layout to plan the cable layout design.
For standing seam roofs or steep roof pitches, ensure your layout accommodates the zigzag pattern or straight layout, depending on the level of snow accumulation and ice formations in specific areas. Make sure to account for ambient conditions, such as outdoor temperatures that drop to 0°F (-18°C) or lower, as this will affect the cable lifespan and power output.
Step 2: Gather Tools and Materials
Collect all necessary tools and materials for the installation process, including heat tape, heating cable, adhesive-lined cable clamps, roof clips, self-tapping sheet metal screws, and rubber insulation. If your roof has exposed parts or areas with spray-in polyurethane foam insulation, consider using protective layers to avoid heat loss. Ensure you have a GFCI-protected outlet or a compatible automatic heat cable controller for managing outdoor temperatures.
Step 3: Secure Cable Clips or Roof Clamps
Begin by attaching cable clips or compression-based clamps to the roofline. These hold the deicing cables in place and prevent them from shifting due to wind or falling ice. For gutters and downspouts, install downspout hangers to guide the cables along the drainage system. Place the clips every 12-18 inches for a snug fit, ensuring a watertight connection to prevent leaks. Avoid sharp edges near the downspout opening by securing them with zip screws or other fasteners to prevent damage to the cable jacketing.
Step 4: Lay the Heat Cables
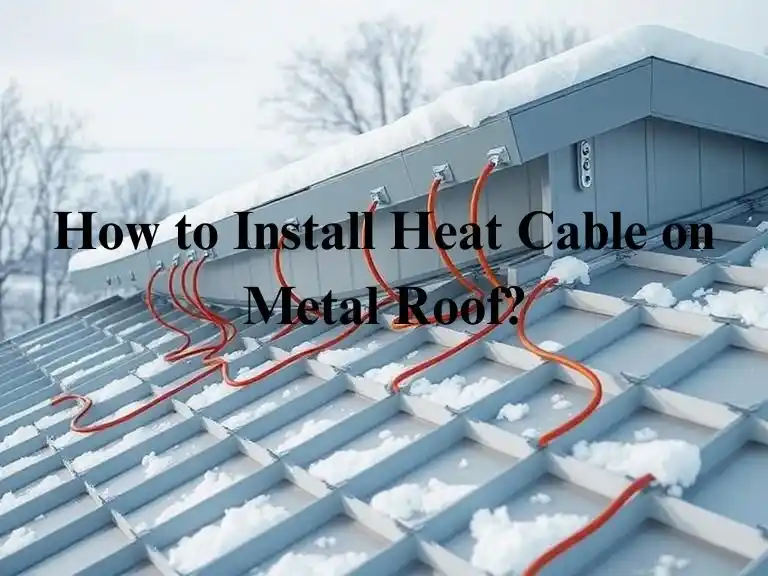
Lay the heating cables in your planned pattern, such as a zigzag pattern along the eaves or a straight pattern for gutters. The triangular pattern is effective for preventing ice formations in roof valleys and other coldest areas. Extend the cables into the gutters, downspouts, and any drain openings to maintain proper water flow and avoid standing water that could freeze.
Ensure the heating tape is installed in sections that align with the roof and gutter deicing system requirements. For energy efficiency, use a self-regulating cable that adjusts its heat output based on the surrounding temperature changes.
Step 5: Connect to Power Source
Connect the heat cables to a high-voltage power source. If your system requires 240 VAC or 120 VAC, ensure compatibility with your circuit breaker. A weather-resistant lead should be used to protect the connection point. Pair the cables with an automatic thermostat or sensing device to ensure they activate at the optimum temperature (around 37°F to 50°F) and remain energy-efficient. Always have a certified electrician handle the wiring to ensure safety and compliance with local electrical codes.
Step 6: Test the System
After connecting the cables, test the system by turning it on. Check that the heat cables generate consistent warmth along the roofline, gutters, and downspouts. Pay close attention to areas with snow slides, ice dams, or standing water to ensure the system effectively prevents these issues. Inspect for any cuts, breaks, or improper connections, and address them immediately to maintain the integrity of the cables.
Step 7: Apply Protective Measures
To protect the cables and enhance efficiency, apply a protective layer such as rubber insulation or aluminum foil covering over the cables. This prevents heat loss, prolongs the cable lifespan, and reduces the risk of overheating. In addition, install snow guards to prevent large amounts of sliding snow or icicles from dislodging the cables.
Step 8: Monitor and Maintain
Regularly inspect your roof and gutter deicing system during winter to ensure it operates effectively. Look for signs of wear, such as frayed cables or loosened clips, and replace damaged components as needed. Clean your gutters and gutter walls to prevent blockages that could lead to water damage or mold. Proper maintenance will ensure your system lasts through multiple winters without significant repair costs.
Safety Considerations
Installing de-icing cables on a metal roof requires caution, as working on a roof, especially in winter can be hazardous. Follow these safety tips to ensure a secure installation process:
1. Always Wear a Safety Harness
When working on a metal roof, particularly on steep pitches, wearing a safety harness is essential. Secure the harness to a stable anchor point to prevent falls while moving across the roof. Non-slip footwear and gloves can further improve stability and grip during the installation process.
2. Avoid Extreme Weather Conditions
Never attempt to install de-icing cables during extreme weather conditions, such as high winds, heavy snow, or rain. Wet or icy roof surfaces can significantly increase the risk of slipping. Schedule your installation for a clear, dry day when the roof is safer to work on.
3. Keep Tools and Materials Organized
Organize all your tools, clamps, and cables before starting the installation. This reduces the likelihood of tripping or slipping on misplaced items. Use a toolbelt or roof brackets to keep essential tools within reach while minimizing clutter on the roofline.
4. Consult Professional Installers When Needed
If the installation process seems too complex or if you encounter significant safety concerns, it’s always wise to consult professional installers. Experts are equipped with the necessary experience and tools to ensure the job is done safely and efficiently. This approach is especially recommended for large or intricate roof systems.
Installing heat cables on a metal roof is a smart and effective way to tackle ice dams, prevent snow accumulation, and protect your roof from water damage during winter. By following the step-by-step guide, using the right tools like adhesive-lined cable clamps and self-regulating cables, and adhering to proper safety measures, you can ensure a successful installation that enhances your roof’s durability and energy efficiency. Regular maintenance and monitoring will keep your system functioning optimally through multiple winters, saving you from costly repairs and providing peace of mind. With the knowledge gained here, you’re fully equipped to install your de-icing cables and keep your roof safe and functional in the harshest conditions.